Google Adsense Earning Trick With Coading Sript

  • Subscribe to our RSS feed.
  • Twitter
  • StumbleUpon
  • Reddit
  • Facebook
  • Digg
Showing posts with label Blogger Tips. Show all posts

Monday, 1 July 2013

How To Find And Remove Broken Links In Website/Blog

Posted on 08:30 by Ashish Chaturvedi

How To Find And Remove Broken Links In Website/Blog
What are Broken Links
Broken links are the links which leads to a page that actually does not exist. When you publish any article on your blog than search engines like Google indexe it and add your article information to its database. After some days or months if you delete your previously published article than it is removed from your blog database but not from Google database.
If anyone search for a keyword related to your article on Google than your article link come up in the search results. And if he/she clicks on the link then it leads to a 404 error page.


How to Find and Remove Broken Links?

1. First of all login to Google Webmaster Tool by going to the link given below:
            http://www.google.com/webmasters/
2. Now go to Dashboard and select the blog that you want (if you have more than one) from the drop down menu situated at right top.
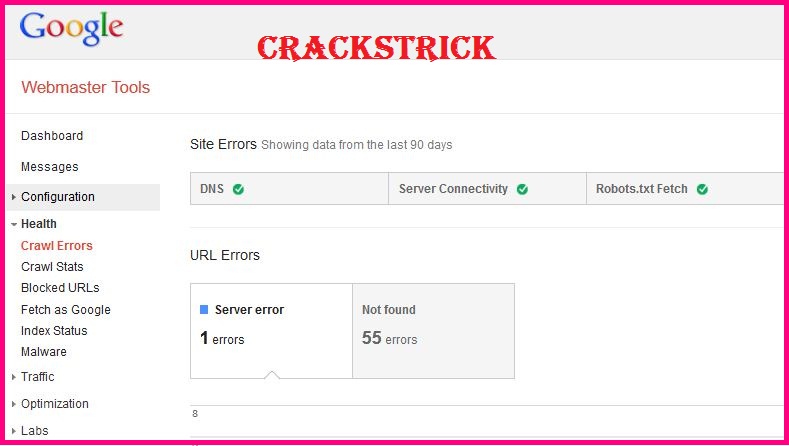
3. Go to Health>Crawl Errors and than click on Not found option as shown below.

How To Find And Remove Broken Links In Website/Blog


4. After that you will see a list of all the broke links in your blog. Than click on any link from the list, now a new pop-up window will open, copy the link from there.
5. Now go to Optimization>Remove URLs and than click on Create a new removal request, paste the link that you have copied earlier in the box as shown below and than click on Continue button.

How To Find And Remove Broken Links In Website/Blog


6. A new window will open,there click on Submit Request as shown below.

How To Find And Remove Broken Links In Website/Blog


7. After completing this process just mark all the links as fixed so that these links will be not listed in the Not found list, otherwise they may confuse you in future.

8. You have done!!!!
Read More
Posted in Blogger Tips | No comments

Friday, 28 June 2013

Online Duplicate Content Checker Tools For Website/Blog

Posted on 21:27 by Ashish Chaturvedi
Online Duplicate Content Checker Tools

Dear readers today I am going to tell you how to find duplicate content in your site/blog using some online tools. If you wish to have a good website/blog then there should not be any copied contents in your website/Blog. If there is duplicate contents in your website/Blog it gradually decreases the readers and visitors of your blog.
It also decrees the rank of your website/Blog which will badly affect your website/Blog. Duplicate content confuses search engines. Because they have a hard time deciding which page is most relevant for a search query. Search engines will never display two identical pieces of content in the SERPs. This is done to ensure the highest search quality; seeing the same content twice is not very interesting for the user. Another problem is the ranking power of duplicate pages. Instead of having a single page with a lot of authority, you have multiple pages with diluted, suboptimal performance. This might cost you a lot of organic traffic.

Here are some Online Duplicate Content Checker Tools


1. Duplichecker 
Free plagiarism checker for avoiding plagiarism, best anti plagiarism detection tool for detecting plagiarism online.

2. Plagiarisma
Free online plagiarism checker. Duplicate content check. Plagarism detector. Plagerism software. Turnitin free alternative. Check your txt,html,rtf,doc,odt,docx,pdf files.

3. Plagium
Plagiarism Tracker, Plagiarism Checker,Plagium, Plagiary, Plagiarist, Plagiarism, Fabrication, Falsification, Leech Finder, Source Tracker, Source Finder, Pirate Tracker, Copyright, Copyright Law, Unauthorized Use, Copyright Violation, plagiat, plagiats, plagier, détection de plagiat, droits d'auteur, deteção de plágio.

4. Copyscape
Copyscape is a free plagiarism checker. The software lets you detect duplicate content and check if your articles are original. 

5. Duplicate-content
Duplicate content issues determination, analysis and corrections for Duplicate Content Penalties.


6. Similar-page-checker
This tool allows you to determine the percentage of similarity between two pages.

7. Dupefreepro
Protect your search engine rankings from duplicate content & online plagiarism.

8. Articlechecker
Article Checker is a free web plagiarsm checker, article checker, and duplicate content checker tool. It also scans your web page for others who may have copied it. 

9. Dupecop
DupeCop - Online and desktop tools to detect duplicate content.

10. Copygator
CopyGator - Catching duplicate content & plagiarism in the Blogosphere.

Read More
Posted in Blogger Tips | 2 comments

Wednesday, 26 June 2013

How To Add Links In Comments?

Posted on 08:44 by Ashish Chaturvedi
How To Add Links In Comments? 
Dear readers as you know while commenting if we make a link in the comment it makes the people who read comments can easily redirect to the linked site. Today I am going to tell about how to add links in your comments. Here is a simple trick to add links to the comment section of a blog. This will help to increase your blog traffic. This is one of the best method to promote your blog.


This is the way how you make a clickable link in Blogger


Just Write this Code in the Comment box

<a href="URL">TITLE</a>

Replace URL With your Link
 Replace TITLE With your Link


Example:

<a href="http://crackstrick.blogspot.com/">CracksTrick</a>

Read More
Posted in Blogger Tips | No comments

Sunday, 23 June 2013

How To Get Backlink From Our Content Copiers?

Posted on 03:13 by Ashish Chaturvedi
How To Get Backlink From Our Content Copiers?

Dear Readers as you know if you are the owner of an article then there may be thousands of copiers for your article. So our hard work for making the article will be easily copied by other bloggers.  Now there are thousands of blogs developing daily. So if you get backlink from those bloggers it automatically make our blog famous and we will get more visitors.
Today I am going to tell about how to avoid this using Tynt


First let me tell you what is the use of Tynt ? 

Tynt Is A service tool for bloggers which will help us to get backlinks from our content copiers. Tynt automatically inserts URL of your page when your content is copied and pasted. Thus it automatically increases your traffic or SEO. Thus you will get good rank and more visitors for your site

Now follow the steps given below to use this service  

  • First to go to Tynt.com
  • Now create a account from Tynt.com 

How To Get Backlink From Our Content Copiers?

  • Now you get after entering the details click on Submit
  • Now after creating a account you will get a code to verify your site
  • Now follow the steps given below for verification
  1. Login to blogger and go to the specified blog's dashboard
  2. No click on Template and select Edit Template
  3. Now press Ctrl+F and find </head>
  4. Now paste the code  just before or above the </head>
  5. Now Save the template
  • After that go to tynt.com  and click on Test The Script
  • Ater that click on Go To Continue To Publisher dashboard
Now You Are Done!!

Read More
Posted in Blogger Tips | No comments

Saturday, 22 June 2013

Best Ways to Make Money By Blogging

Posted on 08:04 by Ashish Chaturvedi

Dear CracksTrick readers today I am going to tell you about making money from our blogs. Making money from our blogsis an important goal for alot of bloggers, but most of us invested alot of time and may so money too, but usually we disappoint with the results. and always ask, What is the best way to make money from our blogs, And what we all should know is that the answer is not the same for every single person and blog.
But we can try to list the best and easiest ways to make money, at this article, i’ll just list it, but latter in my next articles, i’ll talk about the ways in more detailed tutorials.and here is the 5 ways,
1. Advertising Programs
This is one of the most used ways to make money because it’s too easy to add it to your blog, and the most famous advertising Program is Google Adsense.
this programs is easy because you don’t have to do any thing but adding the program code to your blog, and then work on placement and traffic.
Other Advertising Programs
- Chitika
- Adbrite
2. Affiliate Marketing

This programs is working in many ways,they provide you a banner that you can place on your blog, so your visitors can visit it, and your can earn if your visitors sign up for a website or Buy something for example , this programs give you a commission from 5% Up to 75% per lead.
Affiliate Marketing companies
- Commission Junction
- LinkShare
- Click Bank
3. Place a Donation Link or Button on Your Blog
and this way depends on your blog visitors, and how your blog useful for the visitors,
it won’t make you get alot of money but it may help you getting few dollars,
4. Sell Products On your blog.
you can sell related products on your blog if you have got good amount of traffic, and this way is great when your concentrate on one niche.
you can sell e-books, soft wares, download able products,
and more,
you may sell your own products or other people products.
5. Sell Advertising Space On Your Blog.
This is a great way for making money and guaranteed way, because it’s easy and one step way, just try to sell your spaces and relax for next 30 days.
You may Use to have a good chance to sell your spaces like:
- BuySellAds.com
Read More
Posted in Blogger Tips, Earn money online | 1 comment

Wednesday, 19 June 2013

How To Automatically Add Blogger Post To Facebook

Posted on 03:51 by Ashish Chaturvedi

How To Automatically Add Blogger Post To Facebook
Today you know that the best way to spread your article is social media. So after posting your article many bloggers usually add the article to the Facebook to get more readers. As you know it is some time consuming so today I am going to tell you an easiest way to automatically add your post to your Facebook/timeline.

To automatically add your blogger post to Facebook just follow the steps as shown below

Step 1: First go to RSS Graffiti Application Page and login to your facebook then click on Go To Permissions Dialog on the page as shown below


How To Automatically Add Blogger Post To Facebook

Step 2: Now  there  appears two or three permission asking badges as shown in the figure below. Just give permission for those permission asking badge
 

How To Automatically Add Blogger Post To Facebook 

How To Automatically Add Blogger Post To Facebook


Step 3: After giving permissions a new page as show in figure below arrives. Now click on Add Ne Publishing Plan and add the name of your plan
How To Automatically Add Blogger Post To Facebook


Step 4: Now Click on New Source to add your blogger feed url as shown below
How To Automatically Add Blogger Post To Facebook

Step 5: Now select the the Target and add the username and place where the post is to be posted ad shown in the figure given below
How To Automatically Add Blogger Post To Facebook


Step 6: After following the above steps turn ON the update status by double clicking on OFF as shown below
How To Automatically Add Blogger Post To Facebook

Now You are Done!!!  Now your post will automatically posted in Facebook when a new post is published.


Read More
Posted in Blogger Tips | No comments

Tuesday, 18 June 2013

How to Add link Of Post Below Every Post In blogger

Posted on 09:43 by Ashish Chaturvedi
How to Add link Of Post Below Every Post In blogger
Crackstrick readers today I am going to tell you about showing your post links under the specified post. Today I am providing this to get much backlinks to your site. This helps the readers to copy your post so that you get the backlinks to your site. As you know when backlinks increases it gradually increases the site traffic. There are many tips to increase traffic of your site, for traffic increasing tips view our Tips For High Traffic session
 So readers now follow the following steps to Add link Of Post Below Every Post In blogger

Step 1. Login to your Blogger

Step 2. Go to Template

Step 3. Edit HTML

Step 4. Expand Widget Templates" checkbox

Step 5. Now Press Ctrl+F inside the HTML code and find the text given below
                
                                        <data:post.body/>


Step 6. And just below the codejust paste the following code given below


<b:if cond='data:blog.pageType == &quot;item&quot;'>
<p style='color: #7AA1C3;font-weight: bold;'>Do you like this post? Please link back to this article by copying one of the codes below.</p>
<p style='color: #CF152A;font-weight: bold;'>URL Of Post:
</p><textarea cols='60' id='url' onclick='this.focus();this.select()' readonly='readonly' rows='2' style='border:2px solid #666;background:#fff; height: 2.6em; width: 98%;' title='Click to highlight'><data:post.url/></textarea><br/>
<p style='color: #CF152A;font-weight: bold;'>HTML Link Code:</p>
<textarea cols='60' id='HTML-code' onclick='this.focus();this.select()' readonly='readonly' rows='2' style='border:2px solid #666;background:#fff; height: 2.6em; width: 98%;' title='Click to highlight'>&lt;a href=&quot;<data:post.url/>&quot;&gt;<data:post.title/>&lt;/a&gt;</textarea>
<p style='color: #CF152A;font-weight: bold;'>BB (forum) link code:</p>
<textarea id='BB-code' onclick='this.focus();this.select()' readonly='readonly' rows='2' style='border:2px solid #666;background:#fff; height: 2.6em; width: 98%;' title='Click to highlight'>[url=<data:post.url/>]<data:post.title/>[/url]</textarea>
<div style='text-align: right;font-size: x-small;'>
<a href='
http://crackstrick.blogspot.com/2013/06/how-to-add-link-of-post-below-every.html' target='_blank'><span style='color: #838383;'>LinkBack Widget</span></a></div></b:if> 
Step 6. Now Save the Template and now view your site to see the changes

You are Done!!!!
Read More
Posted in Blogger Tips, Blogger Widgets, Tips for High Traffic | No comments

How to Add Related Posts Below Blogger Post ?

Posted on 04:53 by Ashish Chaturvedi
How to Add Related Posts Below Blogger Post ?

Dear CracksTrick readers today I am going to tell you how to add related posts below your post as shown in your the image given below. This is a good way to increase your daily page viewers for your site. If there is related post below your post the visitors those visit a may have a chance to visit other post which automatically increase your page viewers daily. This is a simple way to add a related post in your post so that it won't affect page load time.


Follow the following steps to add to add related post in your post


Step 1. Go To Blogger Dashboard >> Template >>Edit HTML;

Step 2. Check the "Expand widgets template" box;

Step 3. Search (CTRL + F) for this piece of code:

      </head>

Step 4. Copy and paste the below code just before/above </head>


<!--Related Posts with thumbnails Scripts and Styles Start-->
<!-- remove --><b:if cond='data:blog.pageType == &quot;item&quot;'>
<style type='text/css'>
#related-posts {
float:center;
text-transform:none;
height:100%;
min-height:100%;
padding-top:5px;
padding-left:5px;
}

#related-posts h2{
font-size: 18px;
letter-spacing: 2px;
font-weight: bold;
text-transform: none;
color: #5D5D5D;
font-family: Arial Narrow;
margin-bottom: 0.75em;
margin-top: 0em;
padding-top: 0em;
}
#related-posts a{
border-right: 1px dotted #DDDDDD;
color:#5D5D5D;
}
#related-posts a:hover{
color:black;
background-color:#EDEDEF;
}
</style>
<script type='text/javascript'>
var defaultnoimage=&quot;https://blogger.googleusercontent.com/img/b/R29vZ2xl/AVvXsEik6XEE288NvMdl9Bwqix0FcEyHegql5IlFzmLFvZm_6DaOt4KwwIiXQW52v_YPc81NjvTsaoarKiHA7XZtZa6C0hFjbTILERE9ZE3ccC2yvU8Jby7P0wh6jsV7gVApZm8-M6lEqxywO05v/s1600/no_image.jpg&quot;;
var maxresults=5;
var splittercolor=&quot;#DDDDDD&quot;;
var relatedpoststitle=&quot;Related Posts&quot;;
</script>
<script src='http://helplogger.googlecode.com/svn/trunk/related-posts-with-big-thumbnails.js' type='text/javascript'/>
<!-- remove --></b:if>
<!--Related Posts with thumbnails Scripts and Styles End-->


Note:

- to change the default picture, replace the URL in blue with your own
- for displaying more than 5 posts, replace 5 value from "var maxresults=5;"
- remove the code in violet if you want the related posts to be displayed in homepage too

Step 5. Now find the following code:

<div class='post-footer'>

Step 6. And just above it, copy and paste the below code:

<!-- Related Posts with Thumbnails Code Start-->
<!-- remove --><b:if cond='data:blog.pageType == &quot;item&quot;'>
<div id='related-posts'>
<b:loop values='data:post.labels' var='label'>
<b:if cond='data:label.isLast != &quot;true&quot;'>
</b:if>
<script expr:src='&quot;/feeds/posts/default/-/&quot; + data:label.name + &quot;?alt=json-in-script&amp;callback=related_results_labels_thumbs&amp;max-results=6&quot;' type='text/javascript'/></b:loop>
<script type='text/javascript'>
removeRelatedDuplicates_thumbs();
printRelatedLabels_thumbs(&quot;<data:post.url/>&quot;);
</script>
</div><div style='clear:both'/>
<!-- remove --></b:if>
<b:if cond='data:blog.url == data:blog.homepageUrl'><b:if cond='data:post.isFirstPost'>
<a href='http://helplogger.blogspot.com'><img alt='Blogger Tricks' src='https://blogger.googleusercontent.com/img/b/R29vZ2xl/AVvXsEilDrFDIXkd5wEE4WHquQooqnvGFOEF3t7-O6kh_E5DZTdf6h9zOZaWQhQqN20J2czmcEyFZplhkuw_e94gWlQ5LdUGZzmxSXlIR8lVeTkj1ODl1yYSrP7yhf2wOA0xfkc77U1YOSmv6lP5/s1600/best+blogger+tips.png'/></a>
</b:if></b:if>
<!-- Related Posts with Thumbnails Code End--&gt
;

Note:

Change the 6 value from max-results=6 with the number of posts you want to be displayed.
If you want the related posts to be displayed on homepage too, remove the code in violet.

Step 7. Save the Template now you have Done!!!!
Read More
Posted in Blogger Tips, Blogger Widgets | No comments

Thursday, 13 June 2013

New Effective Ways to Build Organic Backlinks

Posted on 10:47 by Ashish Chaturvedi
New Effective Ways to Build  Backlinks

Effective Ways to Built  backlinks quickly. Apart from writing quality content and promoting it through social media, it’s necessary to have some quality backlinks to your blog. After the recent search algorithm changes by Google, many blogs are punished for several reasons. To stay safe and ahead of your competitors, it’s necessary to take some action and building organic backlinks will surely help.

This article is written after getting inspired from a video by Matt Cutts, the head of Google SPAM Team. He clearly mentioned some good points on how to build  backlinks.

What are  Backlinks ?

There are thousands of ways to build links to your blog and none of them are equal to “Organic Backlinks”. In simple words, organic backlinks can be explained as the links that are naturally constructed, which usually happens when you focus on high quality and unique content.

How to built Organic Backlinks ?

Here are 5+ sure fire tips that help to built organic backlinks to your blog.

1. Controversies

Indulging in a Controversy will easily highlight things mostly if you are on the negative side. You need to follow-up regularly and have to be in touch with trending topics. Words have such a great power and believe me, with a single blog post you can grab the attention of the whole media. Play it safe or otherwise you may face some legal issues.

2. Experiments

Experimenting on things will depend on your interest and passion to achieve something. Not everyone can do experiments as it needs lot of time and patience. So, if you are goot at something, then try to experiment on things and publish posts like How-to guides on your blog. This is how unique content can be built and organic backlinks will flow to your article, sometimes for years.

3. Freebies

Using a feebie to get subscribers and backlinks is an old yet powerful strategy. You cannot get backlinks immediately, but over time you can get some quality backlinks. This depends on the quality and type of freebie you are providing. If its a regular one, like a free PSD template  then there wont be much use. Try to work on creative things and give them away for free.

4. Communities

Lets consider some blogs in the WordPress niche. There are quite popular and useful blogs on WordPress that help to make the most out of your WordPress blog. Whenever they write an article or list out some resources, links to the articles on other blogs will be included. This purely depends on the author of the article and so its necessary to establish some connections with fellow bloggers.

5. Video Blogging

Many have the talent to create useful videos yet don’t try it. Consistent exposure can be gained through video blogging and if you need a sort of inspiration to start with, then you can check TheNewBoston (http://thenewboston.org/tutorials.php). That guy got good programming skills and he is sharing some knowledge through his videos. Make videos and your articles will be linked on many blogs.

Bonus Tip

Forum Participation also helps to get some backlinks. All you have to do is help others by providing some useful answers for questions in sections you have knowledge on. And important thing is don’t SPAM posts with single word answers, it may result in a ban.
Read More
Posted in Blogger Tips, Tips for High Traffic | 1 comment

Tuesday, 11 June 2013

Tips to Optimize Blog To International

Posted on 21:15 by Ashish Chaturvedi
 
Tips to Optimize International Websites
Have you ever considered delivering your content for multiple regions and in multiple languages? More and more websites are going international (being made available in multiple languages) these days, and you can easily see why. The broader the audience, the better. And unless you have a region specific website, there's no reason why you should not go international. However, there's a lot more to it than just translation, as emphasised by these quick tips from Google for internationalization.


1. Change your markup instead of your style sheets

Learn where to use markup and where to use CSS for internationalization (shortened to i18n after the starting character i, and the 18 character spaces between the first and the last n). Things like language are inherent to the content present on page. So in this case, markup should be used for i18n. You can't always rely on CSS. So use attributes like lang and dir (for direction) with the html tag as shown below.

<html lang="en" dir="ltr">
Note: In some cases, i18n markup might not be supported by the markup language, as is the case with XML. In such cases, CSS may be used.

2. Use a single CSS file

When using different languages and directions (LTR or RTL), do not use a separate style sheet for each locale. Use a single CSS file, and bundle together existing CSS rules with their international counterparts. A single file makes it easier to maintain things, and only a single file needs to be loaded. Consider a scenario where the default CSS file loaded, but the international file failed to load. A single file approach would be better in that case.

3. Use [dir='rtl'] attribute selector

A language can either have an RTL (Right to Let) or LTR (Left to Right) directionality. RTL directionality requires different markup than LTR. So you can use the [dir='rtl'] attribute selector in this case. For example;
aside {   float: right;}[dir='rtl'] aside {   float: left;}

4. Look carefully at position properties

As in the example above, you often need to reverse or mirror the position properties for RTL and LTR languages. For example, what's aligned left in LTR should be aligned right in RTL. So you should look at all the position-related properties for LTR, and mirror them for RTL. These include margins, padding, text-align, float, clear, and so on. There are tools out there as well that do the job for you, such as CSSJanos .

5. Look closely at the details

Just like with CSS positioning properties, you might want to mirror some other details as well, such as box-shadow for images, text-shadow for text, arrows, background, markers, and so on. Same goes for JavaScript positioning and animations.
Another very important aspect is the fonts and font sizes. A font size for one language might seem adequate, but it may be too small for other languages. For example, Arabic texts usually need to be bigger than English texts because they're difficult to see in a smaller font.


Use the following tips in your blog to Optimize International Websites and enjoy good international traffic
Read More
Posted in Blogger Tips | No comments

Friday, 7 June 2013

How To Redirect Blogger 404 Error Page to Home Page?

Posted on 10:30 by Ashish Chaturvedi
How To Redirect Blogger 404 Error Page to Home Page?
404 error page (Page Not Found) is part of every website and blog. According to Wikipedia, "The 404 or Not Found error message is a HTTP standard response code indicating that the client was able to communicate with the server, but the server could not find what was requested."

A non existing page on a website/blog will result to a 404 error page and this might give first timer a wrong impression about your blog. So the best solution to this type of situation is to redirect your blog 404 error page to your blog home page or a certain page on your blog. This can be done by adding a simple piece of JavaScript code to your blog. Follow the procedure outlined below to redirect your blogger error 404 page to homepage.
==> Log in to your Blogger Dashboard, then go to Settings >> Search Preferences >> Custom Page Not Found (Under Errors and redirections).

How To Redirect Blogger 404 Error Page to Home Page?

==> Click on edit, paste the code below into the box and then Save changes

Sorry, the page you were looking for in this blog does not exist. 
You will be redirected to homepage shortly<script type="text/javascript">
//Blogger 404 Redirect v1.0 by Sam
BSPNF_redirect = setTimeout(function() {
location.pathname= "/"
}, 5000);
</script>

Customizing the Redirection Code

  • • You can change the message on the top (i.e. Sorry, the page you were looking for in this blog does not exist. You will be redirected to homepage shortly) to anything you like
  • • The 5000 in the code represents delay in milliseconds. You can change the 5000 to any value. Changing the value to zero simply means your 404 error page will be redirected to your homepage or any desired page without any delay.
  • • If you are willing to redirect your blog 404 error page to another page other than your home page, just replace pathname to href and / to the url of the page.
Read More
Posted in Blogger Tips | No comments

How To Optimise Google Adsense For High Earning

Posted on 08:04 by Ashish Chaturvedi
How To Optimise Google Adsense For High Earning
                                                                           
Google Adsense is a free program run by Google that allows you to display Google adverts on your blog/website and pays you everytime someone clicks on one of these ads. Just submit your blog to Google for approval and after your content has been approved, you are ready to place Adsense ads on your website.  But beware, Google Adsense doesn't approve any sites! According to Adsense policy you are not allowed to do the following things:


1) Do not click on your own Adsense ads by any way.
2) Do not increase Adsense ad impressions with some automating tools.
3) Don’t ask others to click on your ads.
4) Don’t alter the Adsense code other than fonts and colors.
5) Don’t put Adsnese code on adult or prohibited content.

Some basic optimization tips can double your Adsense revenue, so i've added a list of some of the best Google Adsense Tips and Tricks for making more money from the Google Adsense program.

Tips to Increase Google AdSense Earnings

1) Place the Adsense ads above the main fold that user can see your ad units without scrolling down on your site. This will increase your Ads Click Through Rate (CTR)

Because browsers and screen sizes vary, Google has created a nice tool that allows you to enter any URL, and check whether you've implemented your ads above the fold.

2) The best performing ad units for AdSense are:

250×250 Square
160×600 wide skyscraper
336×280 large rectangle
300×250 medium rectangle

Use them wisely. I suggest you to place 250 x 250 size ad units at the top of every post and align it at the right or left side of the post content. The 160×600 ad format can easily fit in the sidebar of your blogger blog.

3) You can use the following “heat map” provided by Google to analyze other top performing ad placement slots. You should concentrate on the areas with darker orange color which represents the hot spots of the ads slots. (see in the image below)

How To Optimise Google Adsense For High Earning

4) Text ads are good for the first Google Ad unit. I also recommend you to place a 300×250 unit in the sidebar (or somewhere below the fold) – these generally serve CPM based ads and will help you monetize visits from places like Digg and StumbleUpon.

5) Ads placed in-between the content can also perform well. If you have small posts then put ads at the top of the page content. If you have big post then ad units placed at the bottom or middle of the post.

6) Do not use borders to your text ads or use them wisely.

7) To blend, choose the colors that match with the colors of your website: for example if your site background is black, you will put the same background for your Adsense ads. If your links are blue, then select the color blue for Adsense links. If your titles are red, then make your Adsense block titles red.

8) To complement, use colors that already exist on your site, but don't match the background and borders exactly where the ads are placed.

9) To contrast, choose colors that stand out against the background of your site. Contrasting is recommended only for sites with dark background, so we suggest using an ad style with white background, white borders, and blue titles. (google hints)

10) Use link units near the site navigation bar. The main advantages of this placement, are that they can perform well and you don't need too much Ad space on your site. This way, your site looks clean and also, your visitors will be annoyed.

11) Study your keywords and the target ads to these keywords. Usually, Google Adsense crawler searches for the first or second paragraph to target ads to that page so don't forget to add your page-targeted keywords at the beginning of your post.

12) MFA (made for AdSense) sites are websites created around AdSense keywords, and often, these are poor quality sites with little or no original content. Use Allow and block ads feature to block low paying or irrelevant ads showing on your site. And be careful when you're doing this, sometimes one ad unit can give you $0.01 in one country and $1 in other country.

13) Use Google Adsense ad preview tool to view what ads are showing on your site.

14) Many times you can earn you more adsense revenue from Image search engines than with the regular web traffic. Upload good quality images and use text captions with alt tags to make sure that blog images rank good in Image Search results.

15) Add a search box at the top left region of your blog and use the word "search" in the submit button otherwise visitors might be confused and might not notice it. If you use a second search box, put it at the bottom of your pages.

Read More
Posted in Adsense Earning, Blogger Tips | 2 comments

Thursday, 6 June 2013

Add Your Blog / Website Into Alexa

Posted on 12:00 by Ashish Chaturvedi
                                       
Add Your Blog / Website To Alexa

Alexa.com is the top most tool to check website ranking. Being is blogger you must need to improve your alexa ranking because it shows the authority of your blog/website and even advertisers also check your alexa ranking to know about your blog traffic and page views before buying an ad space on your blog. Ranking under 100K is really good which shows the value of your blog. The first step to improve your ranking is to claim your site on alexa and submit your blog details.
Alexa have its own systems that index new sites in their database but submitting your site manually is the best way to improve alexa ranking. Here is the tutorial on how to submit blog in alexa. Let's start the tutorial.

Add Your Blog on Alexa


Below are some steps which you have to perform to submit your website in alexa.
    • Visit Alexa.com and create an account.

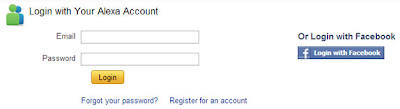
    • Now log in to your account. If you don't want to create new account then you can also log in with your facebook account.
    Add Your Blog / Website To Alexa


    • Now go to alexa site owner page.

    • Now enter your blog/website domain name and click on Claim Your Site button as shown in below screenshot.
                                     
    • On the next page you will get all the plans and prices that alexa offers. As being a blogger I recommend you to choose Free plan. Click on Sign Up button under "Free Plan".
                                  choose alexa plan
    • Once you click on sign up button, on the next page you will see two verification options.
                                 alexa verification
    • If you are a blogspot user then choose Option 2 and add a meta tag in your blog template under <head> section. Before adding meta tag please backup your blog template.

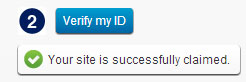
    • After adding meta tag in your blog, go back to alexa and click on "Verify my ID" button.If everything is right, you will receive a confirmation message like below picture.
                                          alexa confirmation
    • Click on continue to add your site details. Fill all the details like your site title and description, alexa rank in country and fill your public contact information.

    Ya You Have Done!!!!
    Read More
    Posted in Blogger Tips, Tips for High Traffic | No comments

    Wednesday, 5 June 2013

    Tips To Reduce Blog Bounce Rate

    Posted on 19:54 by Ashish Chaturvedi

    If your blog posts are not sticky to your first time readers, then surely bounce rate of your blog will increase. Bounce rate is the biggest enemy for your blog which can ruin all its ranking from top to bottom. All major search engines specially Google hate those blogs that have too much bounce rate. It shows the weakness of a blog. If you want your blogging business at peak then start working today to reduce your blog load time. In this article I will tell you 9 best ways that you can follow to overcome this issue.
    You can easily won by this enemy with little efforts and can be a successful blogger to achieve your goals. Let's go to the tutorial.


    What is Bounce Rate?


    Bounce rate is simply the percentage of visitors who just enter into your blog from any source like from search engines or from any referral site, and go back without clicking on a single link. In other words if you open a blog to check its latest updated posts and you found that there is no update then surely you will go back. This will give that blog Bounce Rate.

    How to Reduce Blog Bounce Rate?


    There are some common mistakes that every newbie blogger did that increase their blog's bounce rate. Let study about them and I will tell you how you can overcome from these mistakes.


    Quality Content


    There is a well known phrase in blogging that content is king. Yes content is always king. If you are not providing best written and unique content then why they visit your blog. Means more bounce rate. So, try to generate best quality content for your readers that will help you to increase your blog readership.

    Interlink Your Older Posts


    Whenever you start writing your new post, always try to interlink your old posts by using proper hypertext. It will provide your reader more option to read their old posts. It not only helps you to decrease bounce rate but even it will increase your blog ranking in search engines. It is a well known SEO (Search Engine Optimization) technique. Wikipedia is the best example for this technique.

    In the above example word "SEO" is linked with our SEO page. This is called as interlinking or internal linking.


    Provide Better Navigation


    Always try to use better navigation system in your blog. Your readers should be able to understand your site structure. Provide them all the ways so that they can read your blog content easily. Like add categories into blog sidebar, make a sitemap page show your blog archive etc.

    Open External Links into New Tab


    Sometime you need to link to external sites to provide your readers more facilities. Like if you are running blogger template blog, then you surely need to add demo and download link into your blog posts. Always open that type of links into new tab. You can do this by using target="_blank" attribute to your hyperlinks like the below example.

    <a href="Page URL" target="_blank">Anchor Text</a>

    Show Post Summary


    Use read more link on your blog Homepage and labels page to show only post summary. Don't show your full length post. If the post will be of reader's interest then he/she has to click the link to read full article. That means you beat your enemy means bounce rate. Cheers!


    Show Your Popular Posts


    Popular posts widget in blog sidebar plays a very important role to decrease blog load time. It shows the trendy posts of a blog and encourage the readers of read those posts also. If you are using blogger's default popular posts widget in your blog then remove it and add our stylish popular post widget that shows a stylish and beautiful rounded image along with post title and summary that will attract the visitors.

    • Read: Customized Stylish Popular Posts Widget With Round Thumbnail in Blogger

    Faster Loading Time


    Think if you visit a blog and it takes too much time to load then what will you do? You will surely wait for 3-5 seconds then go to another place for the information. Right?
    This is same for all. Every reader wants to a site to read that give them faster loading experience. Try to reduce your blog load time. Our 9 tips can help you in this matter just read the below post.

    • Read: Plugin Tips To Reduce Blogger Blog Load Time

    Show Related Posts


    Give value to your readers. They come to your blog for information. If they finish reading article and there will no more information then surely they will go back. Always provide them more relevant or related information. To do this you can show your related posts at the end of the post. There are lot of related posts widget but why go for dull and nasty looking widgets. Try our very nifty and stylish related posts gadget that is really eye catching and attention grabbing. It will not even help you to reduce bounce rate of your blog but also increase your blog page views and blog traffic.

    • Read: Stylish Related Posts With Thumbnail Widget For Blogger

    From Your Part To You

    Here I tried my best to provide you some tips and tricks that you can use to protect your blog bounce rate from increasing. This is the thumb rule of SEO. Always try your best to provide best content to your readers. If they like your content then surely will give you credit for that by sharing the content with their friends. Thanks for your precious time to read my article. Happy Blogging :)
    Read More
    Posted in Blogger Tips | No comments

    Best Way To Make Backlinks For Blog

    Posted on 19:05 by Ashish Chaturvedi
                                                     

    Backlinks can change the way of blogging. If Quality Backlinks can improve your blog ranking then bad and poor backlinks can ruin your all efforts and hardwork into vain. Webmasters need to give special preferences to quality of backlinks. In Panda and Penguin World, quantity of backlinks doesn't matter. The thing which matter is Quality. In past, webmasters used to generate backlinks using poor techniques like profile links, link exchange with random websites, generating too many links with same anchor text on which they want to rank their blog in search engines.
    But the time has changed now. Google hates all of these link building techniques. Now we have to work on quality not the quantity. In this article I will share some best tips that can be follow to generate high quality backlinks.

    Quality Backlinks


    Below are some general methods of getting backlinks to a blog and you may be aware with them. But in this post I will tell you how to follow these methods correctly without any risk of SEO penalties. So, take a look at what to do and how.

    Tip 1: Blog Commenting


    Most of you will know that blog commenting is the best method for link building to a blog but do you know how blog commenting works. This is highly recommended to add blog commenting in your blogging schedule. Leave at least 10 comments daily on high ranked blogs same with your niche. It will not only help you in link building but also help you to increase blog traffic. Most of bloggers will know the benefits of blog commenting but they don't know how to take proper benefits of their time they spend on commenting on other blogs. Commenting on those blogs where you get nofollow link is a waste of time. Work on those blogs where you can get dofollow backlink for your blog.
    Use search engines to find CommentLuv and KeywordLuv enabled blogs and leave valuable comments on those blogs on daily basis. When you comment on those blogs then below every comment your recent posted post will be shown with title as anchor text. And even you can also use your keyword in the name field like this Ankit@Blogger Tips Tricks. That means you can get two backlinks from single comment. It will help you to generate high quality dofollow backlinks and your Page Rank will increase.

    Find CommuntLuv and KeywordLuv Enabled Blogs


    This is really a simple job to find those blogs which have installed Communtluv and KeywordLuv commenting system in it. Simply go with your favorite search engine and type the below query.

    1) your keyword "CommentLuv"
    2) your keyword "KeywordLuv"

    It means if I need to find blogs with blogging niche then I will search query like blogging "CommentLuv".

    Once you enter these types of search terms you will get the list of CommentLuv and KeywordLuv enabled blogs. Use them to increase your blog backlinks. Spend at least 20-30 minutes daily to read those blog's articles and leave valuable comment there. Don't put short comments like nice article, good article and all. Blog owner will not accept these types of comments and your efforts will be waste.

    Tip 2: Use Forums


    SEO Forums
    Participating in webmaster forums can help you to increase your blog readership. Readers will let to know about your blog and hence new visitors land to read your content. Denote some time from your schedule to use forums for link building. Answer the questions there under your perfection of field and use signature as a link back to your site. You can use below forums.

    Digital Point Forum


    This forum is especially for webmasters and SEO niche. You can ask your questions there as well can reply to those questions asked by others. Try to reply with best answer. Once your answers got liked by 3 established users then you will also become an established user. Then you can use signature below every answer which you give. Use link pointing back to your blog in signature column. Visit Digital Point Forum.

    Yahoo Answers


    "Yahoo Answers" is the best place to increase your blog traffic fast. There are millions of visitors on this question answer website. You should join this site for your own benefits. Spend some time to reply other's questions. There are 10 levels and when the number of your answers will increase these levels will also increase. As same as digital point forum, here you have the opportunity to put your blog link in source column. But that link will not be active. If you want an active link then you have to reach on second level. Second level means 250 points. 2 points for each answer and 10 points for the best answer if voted by the person who asks the question. Do answering on regular basis, it will bring new visitors to your blog and if they subscribe your feedburner feed then they will become your blog readers. Visit Yahoo Answers.

    Tip 3: Guest Blogging


    Guest Blogging
    Write your best and unique articles for other's blog. Yes, you heard right. Write for others and in return you will be awarded with a very powerful dofollow and targeted backlink with anchor text of your choice. Find blogs under the same niche which you have and contact their owners using contact us form in their blog to submit guest post. If they agree to publish your post on their blog then submit your post and include one or two link between content or in the Author's Bio section with your main keyword as anchor text. Guest Posting is beneficial for both the parties. Blog owners receive free and high quality articles for the blog and in return you receive high quality backlink for your blog.

    Note: Don't always build backlinks for your blog homepage. Try to build backlinks for internal pages also like category pages or any related post. For more SEO benefits you can also link to your sitemap page. By sitemap page, I mean the page which contains links to all published posts into your blog. You can visit my blog sitemap page for better understanding named as Blogger Tips And Tricks. By linking to that page means killing two birds with single stone. First is it will help Google Bots to crawl and index all of your posts and second is visitors will have to click to the links to read the article hence more page views.

    Tip 4: Internal Linking of Posts


    Internal Linking
    Internal links and External Links both plays an important role in SEO. Internal links also count as quality backlinks. Google loves those blogs which works on internal linking strategy. Let me tell you how internal linking works. Whenever you right new post, try to link your previous posts or popular posts with proper anchor text. It has multiple benefits like:

    1. Build Backlinks for all posts.
    2. Search engine crawlers will let to know about your blog content in deep. All the posts will get indexed fast. Hence better crawl rate.
    3. Flow of page rank juice to all internal posts.
    4. Increase Blog Traffic.
    5. Reduce Blog Bounce Rate.
    6. Increase blog visit time, hence better ranking in search results.
    So, what you think does internal linking works? Obviously works dear. Just try it and you will let to know yourself.

    What to Should do is 


    This is all about on how to build backlinks for blog in post panda and penguin world. I have shared my secrets with you guys. Now it's your turn. Use these strategies regularly and effectively and notice the positive change in your blog performance in search engines. I am also trying to learn more methods and ways for generating quality backlinks for blog. If you know other methods then please share them with me. Leave your comments below this post. I will be thankful to you guys. Happy Blogging!
    Read More
    Posted in Blogger Tips, Tips for High Traffic | 4 comments
    Older Posts Home
    Subscribe to: Posts (Atom)

    Popular Posts

    • 7 Best Shorten URL
      7 Best Shorten URL and Earn Money Sites that Pays for Clicks Most of the internet users must be knowing about this URL shortener sites ( Sho...
    • How to increase traffic of blog/website
      User right blogging software (refer to this post : Two of My Favorite Blogging Softwares ) For traffic you need content, so write at least ...
    • How To Convert A Facebook Account To Page?
      Dear readers to I will tell you haw to convert your personal facebook account to a facebbok page.  Are you still using a personal Facebook p...
    • Place Qadabra ads inside blogger post
      Dear bloggers I have given you many ways to insert codes and ads between blogger posts. Today I am introducing you to put the famous ad sens...
    • How To Earn Money Online Using Captcha Work?
       Dear CracksTrick readers today I am going to tell about a good way to earn money online. this is one of the genuine jobs that doesn't h...
    • Best Way To Make Backlinks For Blog
                                                        Backlinks can change the way of blogging. If Quality Backlinks can improve your blog rank...
    • Super Ram 6 Pro Full with Patch for Free
      SuperRam is basically an utility tool to enhance the performance of your computer.Its main features are as follows: Compatible with Microsof...
    • How To Optimise Google Adsense For High Earning
                                                                                  Google Adsense is a free program run by Google that allows you t...
    • Online Duplicate Content Checker Tools For Website/Blog
      Dear readers today I am going to tell you how to find duplicate content in your site/blog using some online tools. If you wish to have a goo...
    • BitDefender Antivirus Crack
                                                                                          BitDefender Internet Security offers Internet-connected ...

    Categories

    • Adsense Earning (11)
    • Anti Virus (4)
    • blog (1)
    • Blogger Tips (79)
    • Blogger Widgets (37)
    • Earn money online (19)
    • Earning By File Uploading (1)
    • Games (1)
    • Hacking (3)
    • Internet (1)
    • Media Players (1)
    • Moblie Tricks (13)
    • Modem Unlocker (1)
    • Online Jobs (13)
    • PC Tricks (16)
    • Serial Keys (2)
    • Skins For Windows (1)
    • Small And Easy Jobs (8)
    • Softwares (29)
    • Speed Up PC (6)
    • Tips for High Traffic (8)
    • Tricks (38)
    • URL Shortner (2)
    • Utilities (21)
    • Web Designer Software (3)
    • Website Tricks (24)
    • Windows (10)

    Blog Archive

    • ▼  2013 (183)
      • ▼  July (3)
        • How To Convert A Facebook Account To Page?
        • How To Send Friend Request In Facebeook When bloc...
        • How To Find And Remove Broken Links In Website/Blog
      • ►  June (25)
      • ►  May (152)
      • ►  January (3)
    • ►  2012 (15)
      • ►  December (15)
    Powered by Blogger.

    About Me

    Ashish Chaturvedi
    View my complete profile